How to achieve the perfect DIY Mani/Pedi
Are you one of those people who tries to achieve a salon-perfect mani or pedi at home, only for it to turn out less than spectacular? If so, you’re not alone, and we asked our friends at Mavala to help pull together a guide to achieving the perfect mani/pedi at home, and the steps we need to follow. It’s no surprise, according to Tracey Winder, Mavala National Trainer, that preparation is the key to a a great mani/pedi result. Winder says there are 4 steps (which can be broken down into sub-steps), to achieving the perfect manicure – 1. Prepare – this step is crucial for creating a great canvas. Remove any excess nail polish and check the state of your cuticles. 2. Buff and Shape – in addition to giving your nails a great shape, buffing also activates blood circulation on the nail bed, stimulating growth and aiding penetration of treatment products. 3. Paint – your paint job is only as good as the foundation you lay, so a treatment product and base coat are essentials for a long-lasting manicure. 4. Finish – finish off with a topcoat for extra gloss and hold and use a fast drying spray to avoid smudging your manicure once you’re finished. A great trick for lasting power is to reapply a layer of topcoat every couple of days. Let’s take a look at these steps in more detail, and you’ll be well on your way to a gorgeous mani.
Step 1 – Clean and Remove Nail Polish
Remove old polish from the nails by holding a cotton pad soaked with nail polish remover firmly against your nail for a few seconds. Then wipe off with a single stroke. Repeat the process until all traces of polish are gone. Remove stubborn polish around the cuticles with a cotton-wool-covered cuticle stick dipped in remover or with a Corrector for nail polish (Mavala do have a good one).


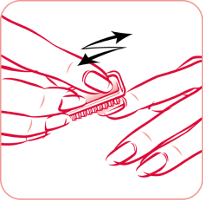
Step 2 – Shape Your Nails
Shape your nails with an emery board. Decide on your desired nail shape (square, round, oval, pointed etc), and then for best results, lightly stroke the emery board from the edges of your nail toward the centre (as shown in the image), holding the board under the edge of the nail and at a slight angle. Bevel for a smooth finishing touch and check for any remaining roughness. Avoid filing deep into the corners of the nails as it weakens them.
Step 3 – Form a Neat Nail Contour
This step gives your nails a really professional look and is one we tend to skip and shouldn’t. Apply a cuticle remover around your nail contour (the part where your nail meets your skin). Wait one minute and then very gently roll back the skin with a cuticle stick wrapped in cotton wool, working away the dead tissue to form a neat outline. Then pass the stick under your nails for a final touch-up.

Step 4 – Wash your Hands and Clean your Nails
After completing the first 3 steps, wash your hands thoroughly and brush your nails with a soft manicure brush. Dry your hands properly, and then clean your nails with a cotton-wool pad dampened with Nail Polish Remover, to remove any last traces or dirt and oil. Nail polish will not adhere properly if any oily film remains on your nail plate. If desired, polish your nails with a buffer for a super smooth nail surface. This also stimulates the root of your nails and provides an elegant shine.
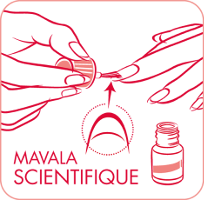
Step 5 – Apply the Appropriate Nail Care Product
If your nails are soft or tend to break easily, or just need a little TLC, this is the point at which to apply a small amount of nail care product, to help strengthen your nails, and help prolong your manicure. MAVALA SCIENTIFIQUE (Mavala’s best selling nail hardener), is a wonderful penetrating nail hardener you can apply to your nails, being careful not to let it touch the cuticle or skin. For an optimal result, it is recommended to use it only once or twice a week. Allow it to dry before going on with your manicure.
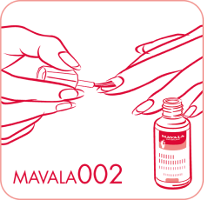
Step 6 – Apply a Base Coat
Believe it or not, we’ve finished the preparation, and we’re now ready to begin the nail painting. To promote the longevity of your mani/pedi, brush on a protective base coat (Mavala do have a good one – Mavala 002 Protective Base Coat), to cover your entire nail surface. Let it dry for a few minutes – it should remain slightly “tacky” to the touch which enables the polish to adhere better. If your nails are fragile, Mavala recommends using Mavala Barrier-Base as the base coat.This (or a standard base coat) will help protect your nails from absorbing the pigment contained in nail polish and lengthen the life of your manicure.
Step 7 – Choose your Nail Polish Shade
Look for a nail polish colour which compliments your natural colouring (cool or warm), or which matches an outfit you are wearing. Whether you prefer neutral colours or bold, there are so many colours on the market, you’re sure to find one to suit. MAVALA has a comprehensive range of nail enamel which offers you a large palette of colours suitable for all tastes. The mini sizes (and budget friendly price) mean you can can afford to get more than one. Why not try something original and create a personal shade by using coats of different colours, one over the other?

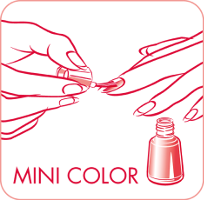
Step 8 – Apply your Nail Polish
Gently shake or roll the bottle of nail enamel before using. For nail polish to adhere properly, apply in two or three thin coats. Mavala’s tips for a perfect colour application, shown on the image below, are: 1. Test the consistency of the polish on your nail tip before beginning. 2. Begin by applying polish down to the centre of the nail in one stroke, from base to tip, leaving a small space between polish and cuticle. 3. Apply the polish to cuticle base, stopping just short of the cuticle. 4. Lift the brush and stroke one side of nail from base to the tip, avoiding the cuticle. 5. Stroke other side of nail from base to tip.

Step 9 – Apply a Top Coat
After your nail colour has dried, lightly brush on a coat of top coat, or other colour fixer. This will help to protect your colour against chipping and abrasion and will give your manicure a brilliant shine. For best results, and to prolong your manicure even longer, re-apply the top coat every 3-4 days, until the colour has grown out (around 2-3 weeks).

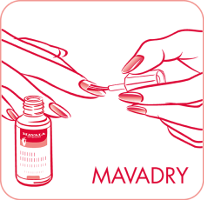
Step 10 – Apply a Fast Dryer
We love a fast dryer. For those of us who are time poor, or who just seem to always smudge a perfectly good mani, these are a must-have. Depending on the brand, in under two minutes, your nails are hard and dry, and you are ready to go. We love the MAVADRY Nail Polish Dryer – in just one minute your nails are touch dry and the colour result is enhanced.
Thank you Mavala for these wonderful tips. Once you’ve achieved a gorgeous manicure, you’ll want to keep your nails looking healthy and strong, and hands in tip top condition. Mavala’s Tracey Winder has also provided us with her tips to keep your nails on point, and hands soft and supple – stay tuned, we’ll be publishing that piece shortly.
